
Hi, all Canva lovers or those who are just starting to use this amazing platform to create work for your business or personal projects!
You’ve been able to share your Canva designs directly on your social accounts for some time. But did you know that there’s a feature on Canva Pro that makes all our lives so much easier? It’s a Content Planner that lets you schedule your designs on your social media accounts directly, with just a few clicks. No more having to download your design first and then go to a scheduling app or your social media channels and re-upload your design.
And Canva has just added a new option so you can schedule your Instagram Business posts too!! You can schedule single-image and video posts directly to Instagram in just a few clicks.
-
- You can schedule up to 25 posts in a rolling 24 hour period
- Galleries aren’t supported by Instagram. You can only schedule to post a single video or image post
- You can use up to a maximum of 20 hashtags in your scheduled caption
- Instagram Stories and Reels aren’t supported on desktop. But you can share Stories and Reels from the Canva mobile app.
It’s a brilliant time-saver for busy business owners and social media marketers!
You can schedule posts to the following social media platforms, with more on the way:
-
- Facebook Groups and Pages
- Instagram *NEW* (requires a Business Account)
- Slack
- Tumblr.
 In this blog, we’re going to show you two easy ways to schedule with Canva and the simple steps you need to take. We’ve done both videos and written instructions so you can follow whichever suits you.
1. Set up your account with Canva Pro
If you don’t have a Pro account yet, which you’ll need to be able to Schedule, use our affiliate link which will give you a free 30-day trial so you can try all the extra features available on a Pro account: partner.canva.com/n14QnM.
2. Connect your social media accounts
Here is a little guide from Canva on how to do that: Sharing on social media and via messaging apps.
3. Create your post
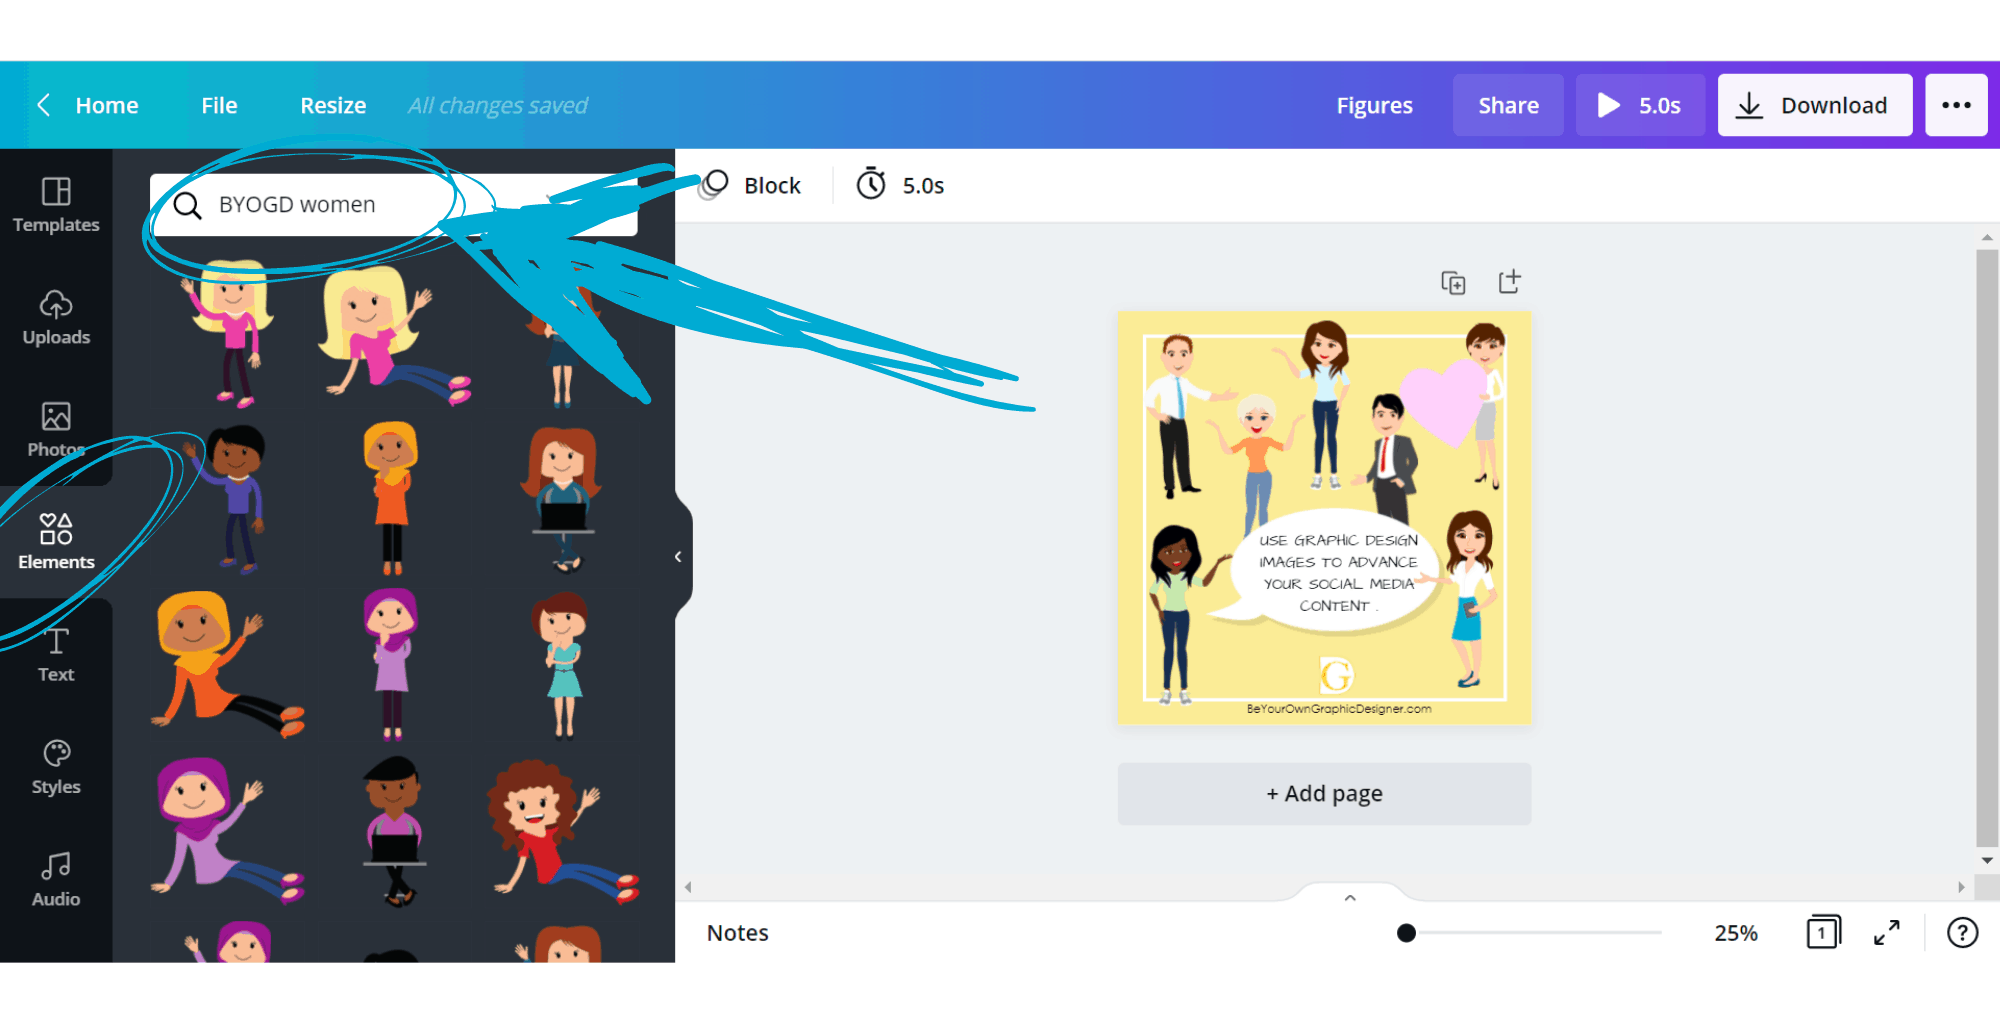
Canva offers an amazing selection of templates and images to use for your design including many of the images from our royalty-free Collection. You can find our images under the “Elements” section, by typing “BYOGD” and adding the type of image you’re looking for, e.g., women, men, cat, business, Christmas, Halloween.
4. Schedule your post
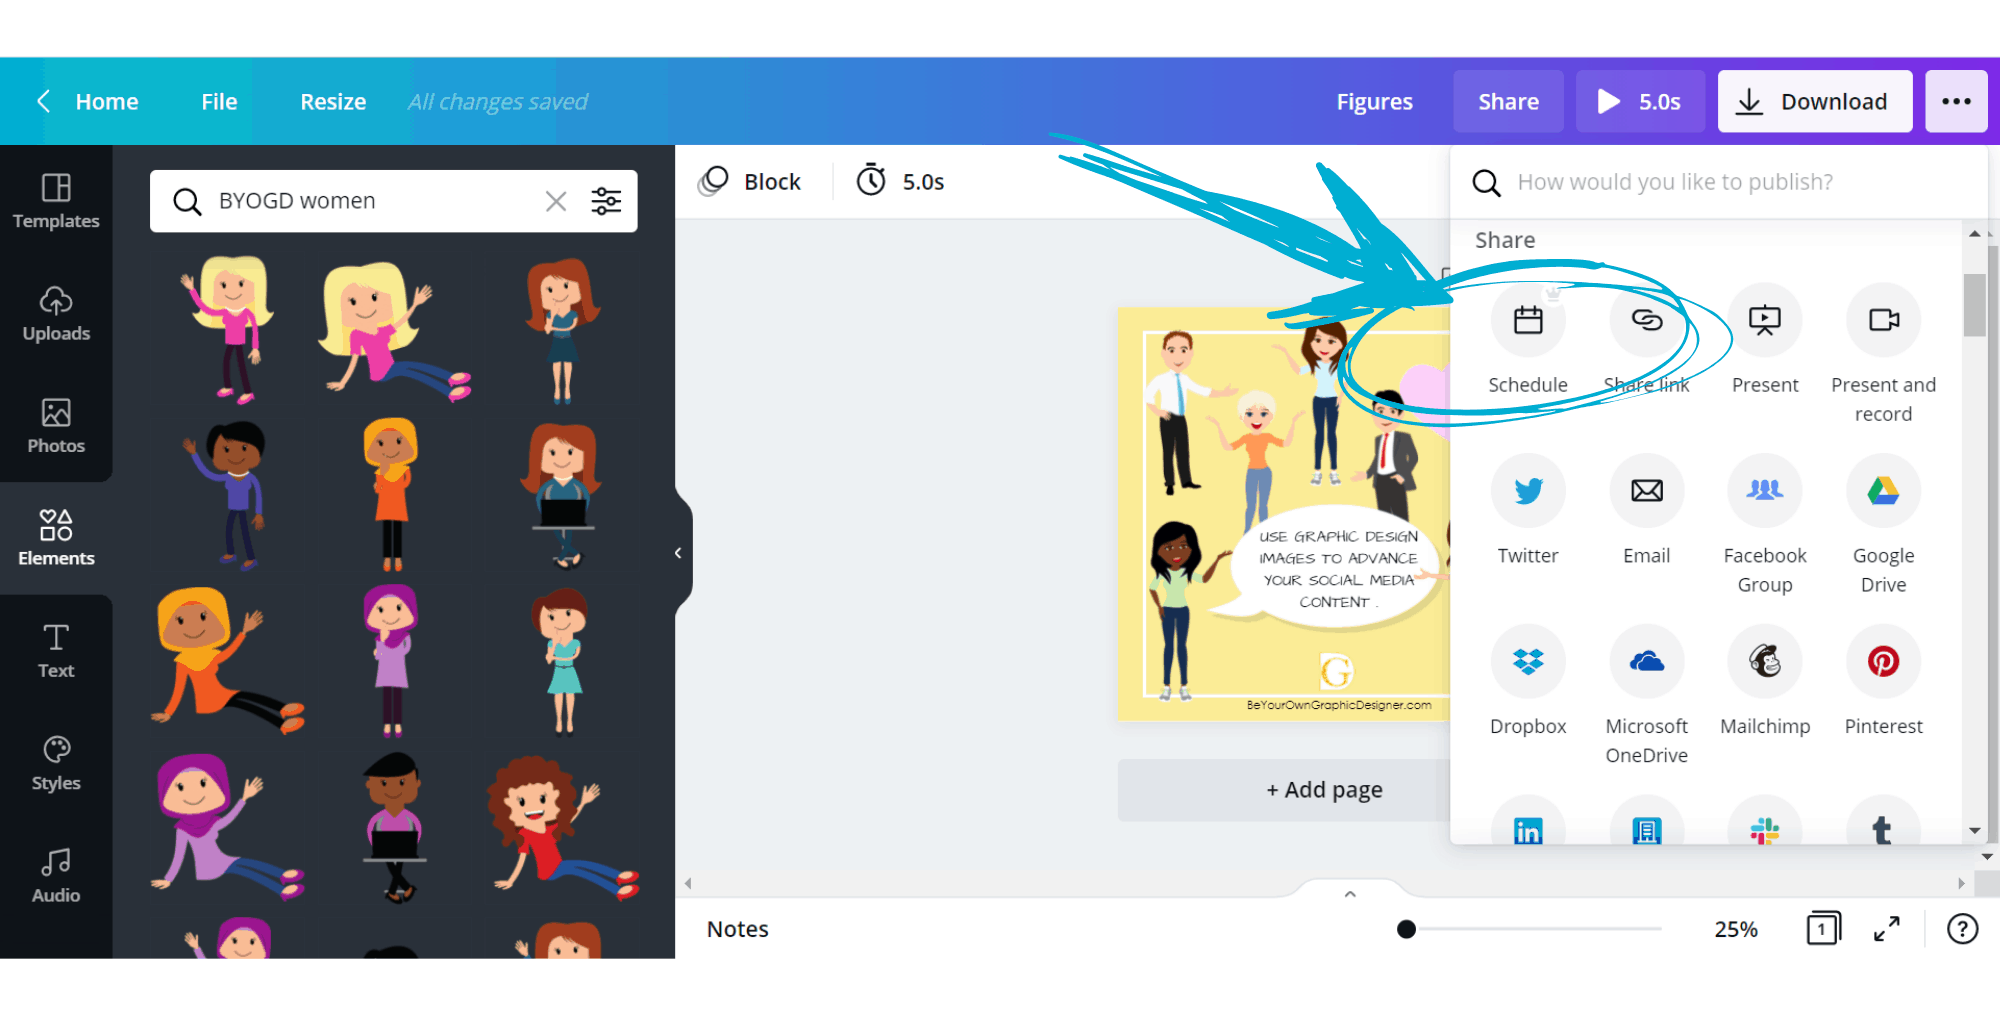
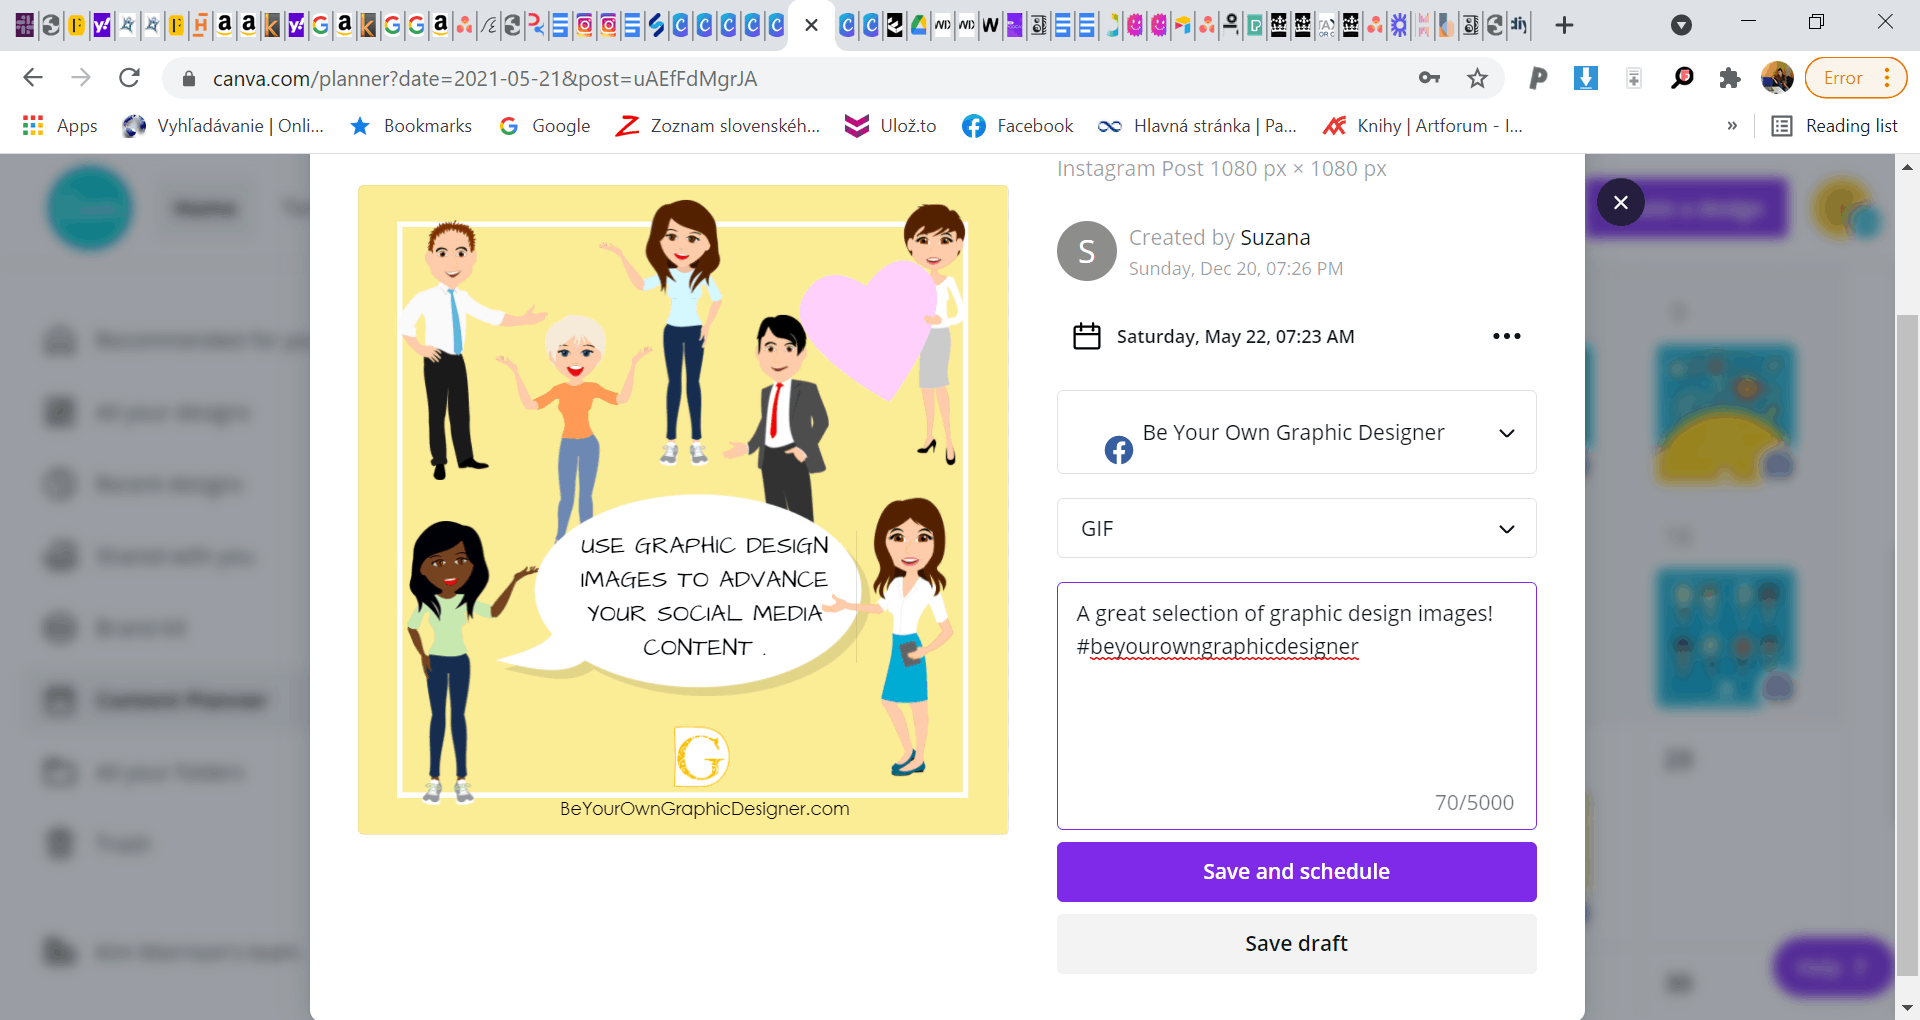
Once you’ve finished your design and you’re ready to schedule, simply click on the 3 dots in the right-hand corner. Click Schedule. You’re then presented with a calendar, where you can easily select the date and time for your post to be published. After you click Next, you can select the social media account that you linked with Canva. Choose a format for your post, write a text and don’t forget to include your hashtags.
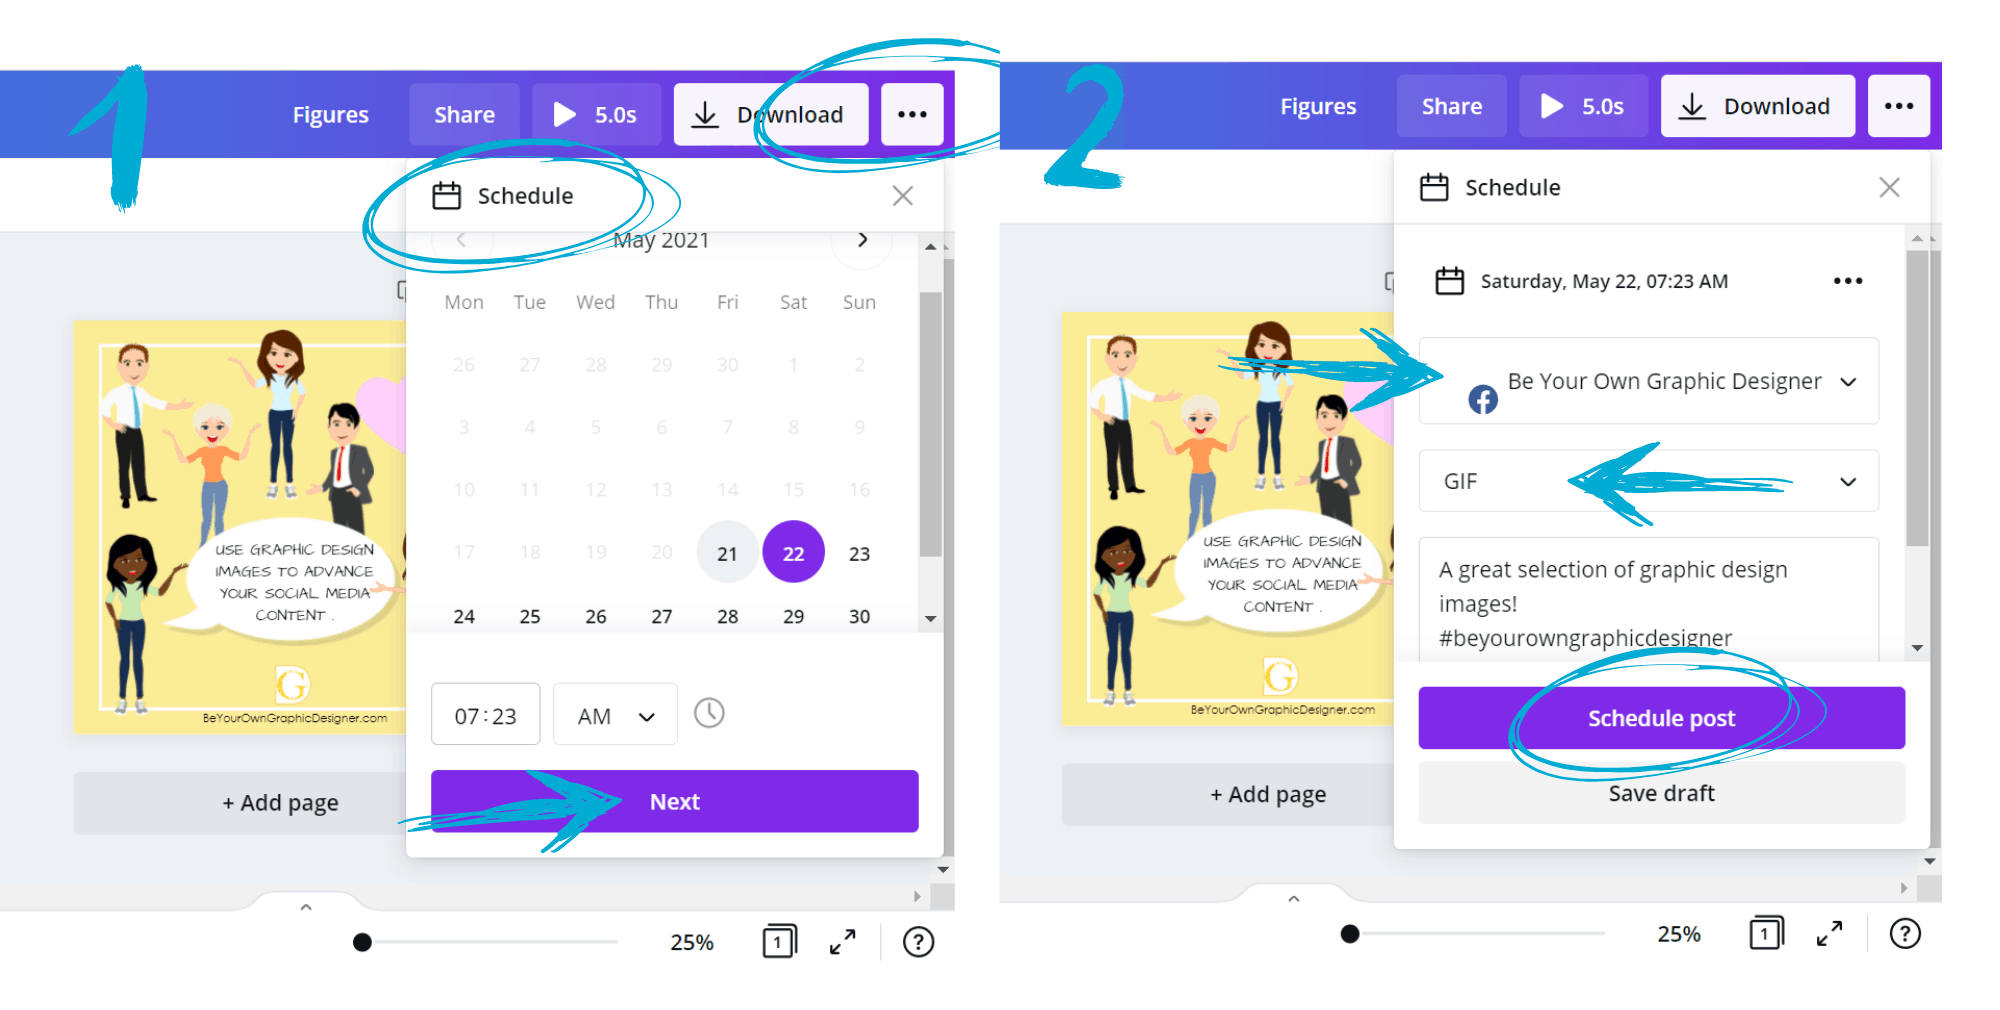
Click Schedule Post and that’s all! Simple as that!
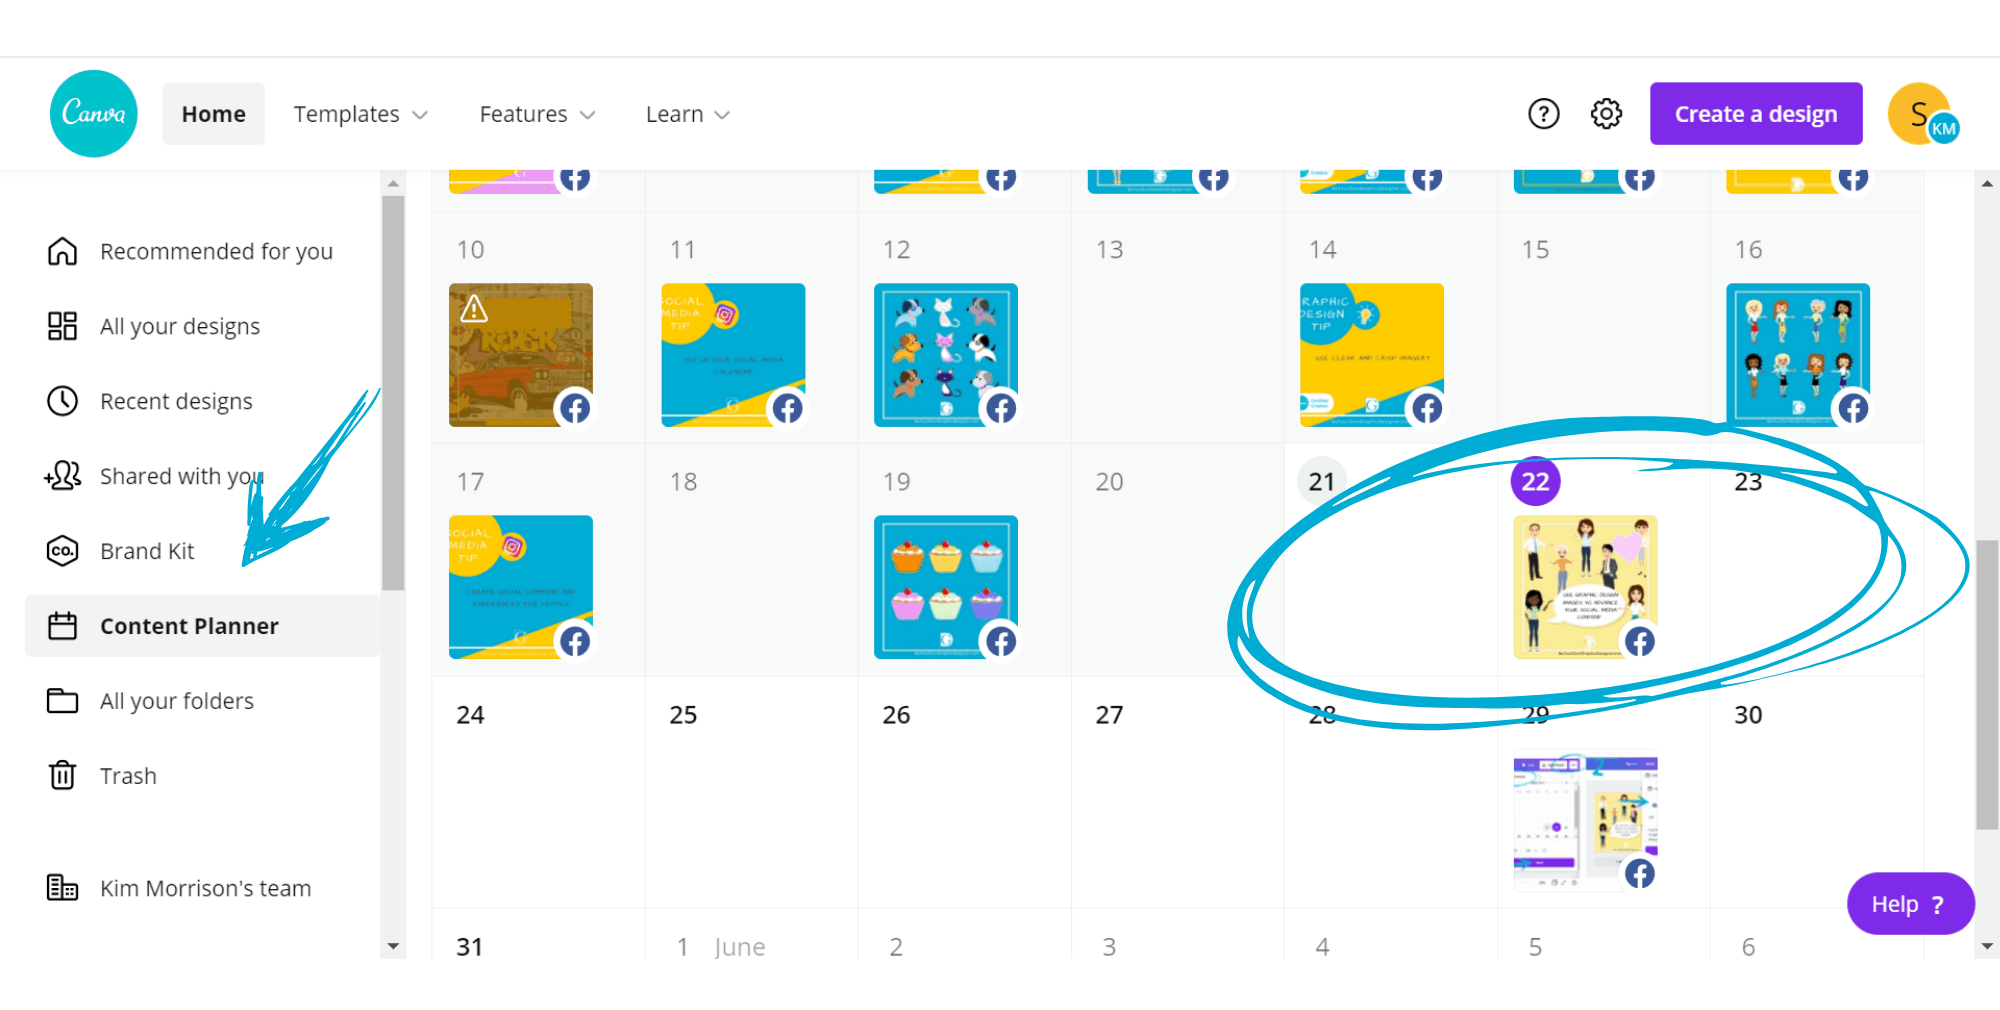
Your design has been scheduled and you can relax! Canva takes care of posting for you!
Just click on Content Planner from your Home page and see all your past and scheduled posts. You can schedule posts weeks in advance, or at optimal times during the day.
Need to Make a Change?
You can reschedule, change the date and time or make changes to your post. Simply go back to your scheduled post and edit it on the fly. All your edits will be seamlessly synced and updated in your Content Planner.
Here’s a video to show you just how easy it is:
Here are some screenshots to help you if you don’t have time to watch the video!
Hope this has helped you understand how you can use Canva’s Content Planner to create professional-looking posts and also save time and money(!) as an all in one user-friendly scheduling platform.
Use Canva to learn, create and schedule your posts to be seen by the world!

